Blogger comes with a feature called labels. This allows us to organize all our posts into specific categories. This topic was chosen because I’ve seen so many people confused about Blogger Labels.
Okay, let’s not waste any time. Let’s find out what blogger labels are, and how they can be used as categories.

According to my understanding, a label is similar to a category or grouping which you can use for grouping your posts on blogger. A label acts as a reference for your blogger search function. A label/tag is used to search for a topic on Google Blogger. The blog engine will then list the related posts that are under that label.
There is a common misconception that blogger labels (post categories/tags) have SEO value. Adding keywords to the label section could help improve our SEO Ranking. They don’t improve your SEO ranking factor. They will organize your content and help readers find similar posts.
It’s not a good idea to enter too many keywords in the label section. This could be interpreted by Google as keyword stuffing, spam activity, or a negative effect on SEO rankings. Avoid this and use 3-4 labels to group similar posts.
Okay, let me now show you how to add labels to the blogger post section.
Step 1: Adding Label to Your BlogSpot Posts:
1. Go to the blogger dashboard.
2. Now click on the “Posts” link on the left-hand side.
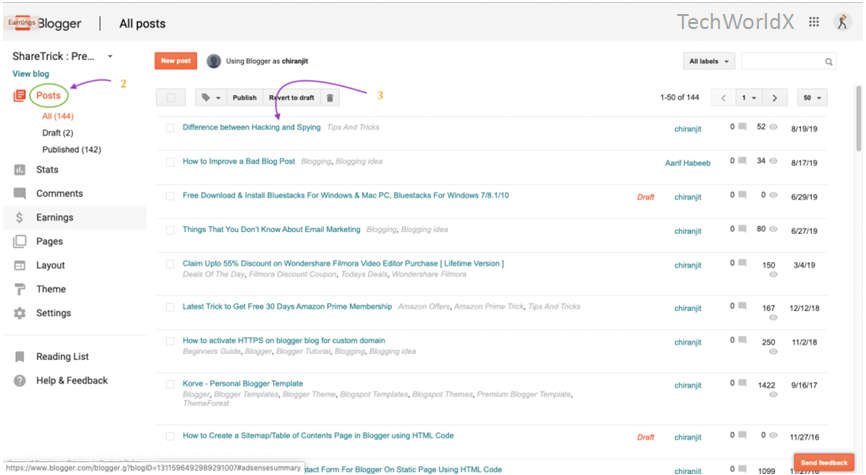
3. Now click on the title of the post to edit.
4. In the Post Editor section, check on the right-hand side and click on the Labels tab from there.
5. Enter your category name in this field. You can then separate multiple categories using commas. Click on the Done button to save the data.
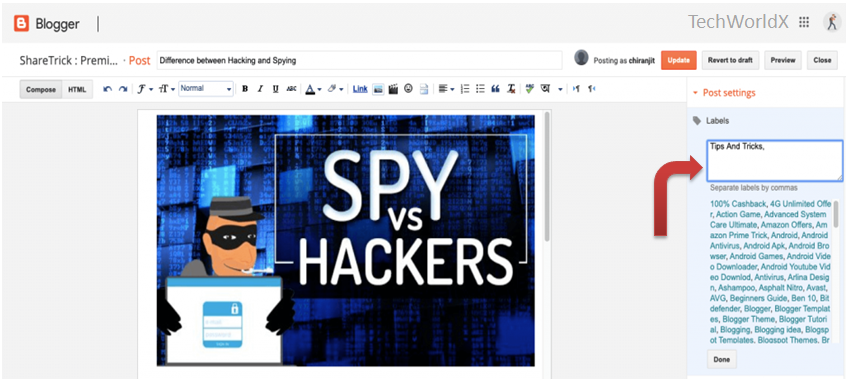
6. Clicking on any existing label below can be used to quickly add labels. This option also allows you to modify or edit your labels.
7. To save the record, click the orange Update button in the top right corner of the post editor area after you have finished adding/editing labels.
Step 2: Find Your BlogSpot Category/Label URL
You can view your labels in the blogger’s posts area after you have created them. You can see the result in the image below.
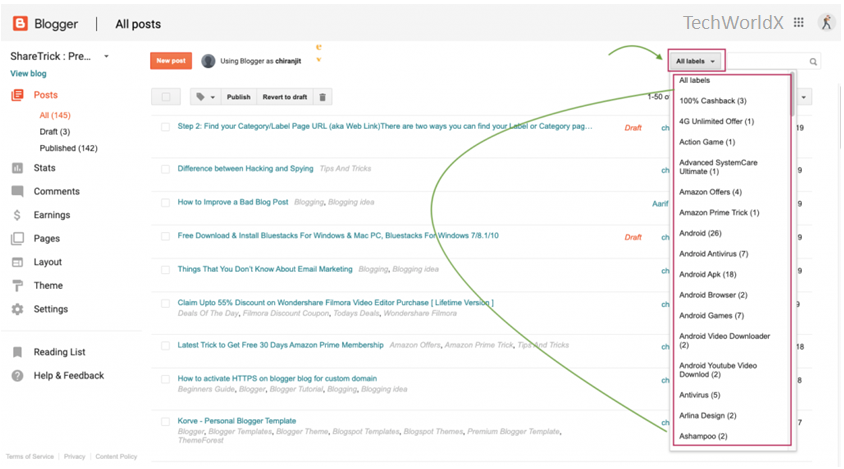
To view any label page link you will need to open the post you previously added.
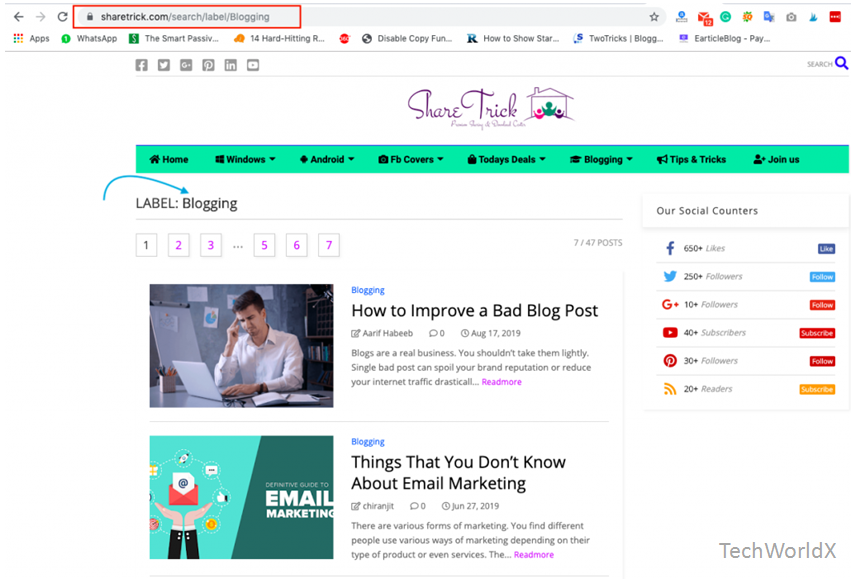
Google blogger labels are usually located in the post header and post footer sections. These labels will appear either under or below your content section. These labels link to a blogger search label page. If you click on one these categorized links, it will redirect you to a search page for your blog that will display all posts that have that label attached. The URL for a post labeled “blogging” will look something like this: https://example.blogspot.com/search/label/blogging
Using Labels in Navigation as Categories
It’s a good idea to add labels to your navigation menu section. This allows us to easily point our blog labels towards a specific category. Follow the steps below to do this.
- Visit the blogger dashboard then click on the Layout tab
- Find your menu link list gadget and then click on the edit option to edit.
- A pop-up window will be open and there you need to Configure Link List.
- Now in the New Site Name section, enter the link name that you want to show on the menu area.
- Next, in the New Site URL field, paste your label page link address ( URL )and then click on the Add Link button to add your link.
- Now click on the Save button to finish the setup.
Blogger automatically generates post labels links, which you cannot customize. To use the page label, or category link in your menu, or any other section, you will need to locate it.
This tutorial is hoped to be helpful. You can reach me in the comment section below if you have any questions.